
Cooling advice online is full of half-truths. We sat down with a veteran thermal design engineer to separate real engineering tradeoffs from marketing noise — covering VRM heat, thermal paste application, and why most home builders overthink airflow.
Introduction
Dr. Elena Vasquez has spent 14 years inside the thermal design labs of a major OEM, where the difference between a good cooling solution and a great one is measured in single-digit degrees Celsius and, sometimes, in warranty claims avoided by the tens of thousands. Her work spans vapor chamber design for high-density laptop chassis and VRM thermal management for the power delivery stages that rarely get a second thought from the average PC builder — until they fail.
We sat down with Dr. Vasquez to talk about the gap between enthusiast cooling folklore and the actual engineering behind keeping a modern CPU or GPU alive for years, not months. If you are assembling a new system, her answers pair well with our own overclocking guide for 2026, which covers the performance side of the thermal budget she describes below.
Q: What is the biggest cooling myth you keep having to correct?
That more airflow is automatically better. I see this in enthusiast forums constantly — someone with seven fans crammed into a mid-tower case, convinced that maximum air volume equals maximum cooling. In reality, fans fighting each other for the same air create turbulence, which disrupts the boundary layer of air moving across your heatsink fins and actually reduces the heat transfer efficiency at the fin surface.
What matters is directed, low-turbulence airflow: clear intake at the front or bottom, a clear path across the components that generate heat, and clear exhaust at the top or rear. Two carefully placed 140mm fans in the right configuration will consistently outperform five fans placed without regard for pressure balance. I have run wind-tunnel style tests on OEM chassis where adding a third front intake fan actually raised GPU core temperature by 2°C because it disrupted the pressure differential the case was designed around.
The second half of this myth is the assumption that positive case pressure is always correct. It reduces dust ingress, which matters over a 3-5 year lifespan, but it is not a universal law — some high-airflow mesh-front cases are explicitly designed around near-neutral pressure, and forcing strong positive pressure on them can starve the rear exhaust.
Q: Walk us through what actually happens thermally inside a VRM, and why it matters.
The VRM — voltage regulator module — takes the 12V rail from your power supply and steps it down to the much lower, much higher-current voltage your CPU or GPU core actually needs, often under 1.3V at over 100 amps on a high-end chip. That conversion is not lossless. Every MOSFET, every inductor in that power stage generates heat proportional to the current passing through it, and under sustained heavy load, VRM temperatures can exceed 100°C even when your CPU die itself reads a comfortable 65°C.
This is the part builders consistently overlook because motherboard monitoring software rarely surfaces VRM temperature clearly, and most air coolers are designed to move air across the CPU socket, not the VRM heatsinks beside it. Sustained VRM temperatures above roughly 110-115°C accelerate degradation of the solder joints and the MOSFETs themselves — this is a slow failure mode, not an instant one, but it is real. I have seen motherboards from budget-tier boards paired with high-TDP CPUs show measurable VRM degradation within 18 months of sustained all-core workloads.
Engineer's note: If you are running a high-TDP CPU on a budget motherboard, check the VRM heatsink design before you check the CPU cooler. A CPU cooler cools the CPU. It does almost nothing for VRM temperatures, which depend entirely on the motherboard's own heatsink and airflow across it.
The practical fix is simple: match your motherboard’s VRM tier to your CPU’s actual power draw, and make sure your case airflow passes directly over the VRM heatsink, not just the CPU socket area. A $180 board with a well-designed VRM heatsink paired with decent case airflow will outlast a $400 board with poor VRM cooling under sustained load.
Q: Give us the correct thermal paste application process, step by step.

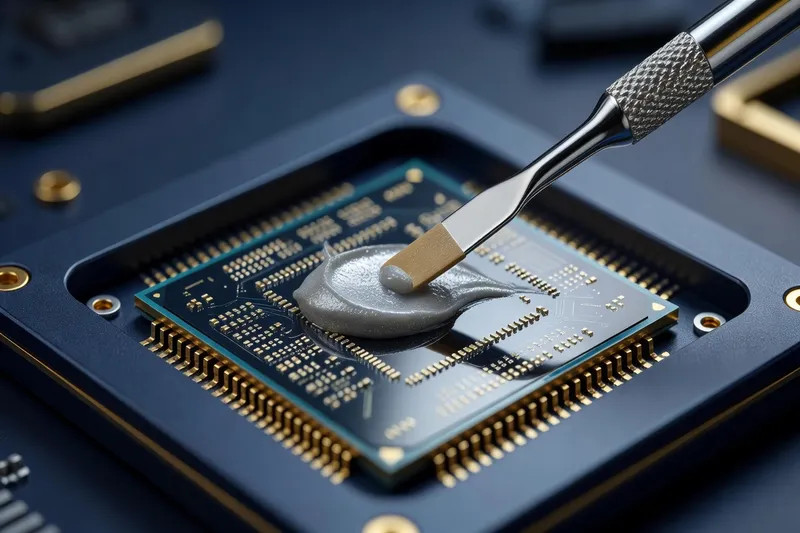
First, clean both surfaces completely — the integrated heat spreader on the CPU and the cooler’s contact plate — with isopropyl alcohol at 90% concentration or higher. Any residue from old paste changes the effective thermal conductivity of the new application. Let it fully evaporate before proceeding.
For application, the pea-size dot method works reliably for the vast majority of consumer CPUs. Place a single dot roughly 4-5mm in diameter in the center of the IHS. When the cooler mounting pressure is applied evenly, that amount spreads to cover the die area without spilling onto the socket or motherboard. For larger IHS designs like Threadripper or some server-class chips, a thin horizontal line across the center performs better because the pea-dot method alone will not spread far enough laterally.
Mount the cooler with even, cross-pattern torque on the mounting screws — the same principle as tightening lug nuts on a wheel. Uneven pressure creates thin spots in the paste layer, which shows up as localized hot spots you would not diagnose correctly if you only look at the average die temperature. Do not remount the cooler repeatedly to “check” the spread pattern; each remount disturbs the layer and typically makes things worse, not better.
A few things that consistently go wrong:
- Too much paste — excess paste does not improve conductivity beyond a certain thin-layer threshold, and it can squeeze out onto surrounding components or, on some sockets, onto exposed motherboard traces.
- Paste applied to a cooler that was not fully cleaned — old, dried paste residue creates air gaps that are worse than a slightly imperfect fresh application.
- Skipping the alcohol clean entirely — using a dry cloth or tissue leaves fibers and oils that measurably reduce thermal transfer.
- Reusing paste on a cooler after removal without recleaning both surfaces — this is extremely common in DIY repastes and one of the top reasons people report “no improvement” after a repaste attempt.
Q: Air cooling versus liquid cooling in 2026 — what’s the honest engineering answer?
The honest answer is that for the majority of builds, a quality air tower cooler is the better engineering choice, and I say this as someone who has designed both. Air coolers have no pump to fail, no tubing to degrade or leak, and a well-designed dual-tower air cooler in the $70-100 range now handles CPUs up to roughly 250W TDP without breaking a sweat.
Liquid cooling — specifically closed-loop AIOs — earns its place in two scenarios: very high TDP chips where the larger radiator surface area genuinely reduces noise for a given thermal load, and small form factor builds where a tall air tower physically will not fit but a slim radiator will. Custom loops go further still, but those are a hobby unto themselves, not a mainstream recommendation.
What I want builders to understand is that AIO pump failure, while statistically rare, is a catastrophic failure mode — you go from cooled to uncooled almost instantly, whereas an air cooler’s failure mode is a fan dying, which is a gradual and far less dangerous degradation. If you go liquid, buy from a manufacturer with a strong warranty and a long track record, not the cheapest unit on the shelf.
Q: What actually matters for case airflow, and what is overrated?
What matters: a clear, unobstructed path from intake to exhaust, positive or neutral case pressure depending on the case’s own design intent, and fan placement that directs air across your heat-generating components rather than just recirculating it. A mesh front panel with two intake fans and one rear exhaust fan, in a case designed around that layout, will outperform a solid front panel with five fans in almost every scenario I have tested.
What’s overrated: fan count as a standalone metric, RGB fans marketed on “airflow optimized blade design” without published static pressure or CFM figures, and the assumption that a tempered glass side panel has no thermal cost. Solid side panels do restrict airflow somewhat compared to mesh, and if you are running a high-TDP build in a fully glass-enclosed case, you are trading some thermal headroom for aesthetics — a reasonable trade for most people, but worth knowing.
Takeaway: Two fans with a clear, directed airflow path will consistently beat five fans without one. Prioritize case design and airflow direction over raw fan count.
Q: What should someone building a small form factor system know about thermals?
Small form factor builds compress components into a much smaller thermal envelope, which means every design decision has less margin for error. Component proximity increases — your VRM, your GPU, and your CPU cooler exhaust are all fighting for the same limited air volume, so heat from one component can directly raise the intake temperature for another.
I always tell SFF builders to underclock their expectations for internal ambient temperature. A full-tower case might see 25°C internal ambient under load; an SFF case can easily run 8-10°C hotter internally simply due to reduced air volume and shorter distances between components. This means a GPU that runs at 72°C in a mid-tower might run at 80°C in an SFF case with an otherwise identical cooling setup — that is not a defect, it is physics.
The practical advice: prioritize case models with documented, tested thermal reviews rather than assuming a smaller case works like a scaled-down mid-tower. Undersized radiators and low-profile air coolers both perform worse relative to their rated TDP in cramped cases, so budget a thermal margin of at least 15-20% below the component’s rated TDP capacity when selecting a cooler for an SFF build.
Q: What temperature thresholds should builders actually pay attention to?
| Component | Safe sustained range | Investigate above | Throttle point (typical) |
|---|---|---|---|
| CPU die (consumer) | Up to 80°C | 85-90°C sustained | 95-100°C |
| GPU die (consumer) | Up to 75°C | 80°C sustained | 83-90°C |
| Motherboard VRM | Up to 90°C | 100-105°C sustained | 110-115°C (degradation begins) |
| NVMe SSD controller | Up to 60°C | 65-70°C sustained | 70-85°C (thermal throttling) |
Die temperature readings from monitoring software are useful, but they tell an incomplete story. VRM temperature is the one metric almost nobody checks that actually predicts long-term motherboard reliability. If your motherboard exposes VRM temperature in its monitoring utility or BIOS, check it under a sustained all-core stress test at least once after building a high-TDP system.
Q: Does undervolting actually help with thermals, or is it overhyped?
Undervolting is one of the few “free” thermal improvements I genuinely endorse, and it is underused by home builders. Modern CPUs and GPUs ship with voltage curves that include a conservative safety margin to guarantee stability across every manufacturing sample, every ambient temperature, and every motherboard implementation. That margin means most individual chips can run at a meaningfully lower voltage than stock and still hit the same clock speeds reliably.
The practical benefit is a direct reduction in heat generated at a given clock speed, since power draw scales with the square of voltage. A CPU undervolted by 50-75mV at the same clocks can see a 10-15°C temperature drop under sustained load, which either lets your existing cooler run quieter or gives you thermal headroom to sustain boost clocks longer before throttling. GPUs respond similarly — undervolting a GPU while keeping its clock curve intact often reduces both temperature and fan noise without a measurable performance loss in most games.
The caveat is that undervolting margins are chip-specific — what stabilizes on one sample may cause instability on another from the same production batch, so it requires testing with a stability tool after any change, not just applying a value you found in a forum post. It is not a substitute for adequate cooling on a hot-running chip, but layered on top of a competent cooling solution, it is genuinely one of the highest-value, lowest-cost thermal improvements available to any builder willing to spend an afternoon testing stability.
Key takeaways checklist
- Repaste based on temperature drift (8-10°C above baseline), not a fixed calendar schedule.
- Match motherboard VRM tier to actual CPU TDP — a CPU cooler does not cool the VRM.
- Prioritize directed airflow over raw fan count; 2-3 well-placed fans beat 5-7 fighting each other.
- Choose air cooling for stock-clocked builds; reserve AIOs for high-TDP or space-constrained builds.
- Budget 15-20% extra thermal headroom for small form factor builds versus a mid-tower equivalent.
- Do not judge a cooling setup by fan count alone — check documented CFM/static pressure and airflow direction.
- Do not remount a cooler repeatedly “to check” paste spread — it disturbs the layer and worsens contact.
If you are shopping for cooling components with these numbers in mind, our best CPU buyer’s guide and best graphics card guide both include thermal design power figures alongside performance benchmarks, and our best motherboard picks call out VRM tier explicitly for each recommendation.
Builders who also run their systems as an always-on home server should note that sustained 24/7 load changes the thermal calculus — the guides at freebsd-howto.com cover running a always-on FreeBSD home server, where consistent thermal monitoring matters just as much as it does in a gaming rig under intermittent load. The lifecycle discipline Dr. Vasquez describes also has a clear parallel in IT operations — see how enterprise hardware maintenance practices at maximo-users.net approach scheduled component inspection versus reactive failure response.
Frequently asked questions
How often should thermal paste actually be reapplied?
For a typical air-cooled or AIO system with quality paste, every 3 to 4 years is fine. If you are seeing temperatures climb 8-10°C above what you recorded when the system was new, that is your real signal to repaste — not a calendar reminder.
Does more fans always mean better cooling?
No. Beyond a certain point, additional fans create turbulence and pressure imbalances that reduce airflow efficiency across the heatsink fin stack. Two or three well-placed fans in a correct intake/exhaust configuration outperform five or more fighting each other.
What temperature is actually dangerous for a modern CPU or GPU?
Modern silicon runs safely right up to its throttle point — typically 95-100°C on CPUs and 83-90°C on GPUs. What actually shortens component life over the long term is sustained high VRM temperature, not a brief spike in die temperature.
Is liquid cooling worth it for a non-overclocked build?
For a stock-clocked mid-range build, a quality air tower cooler is usually the smarter choice. Liquid cooling earns its keep with high-TDP flagship chips, overclocked systems, or small form factor cases where a slim radiator fits but a tall air tower does not.
What’s the biggest thermal mistake first-time builders make?
Ignoring VRM and case airflow entirely while obsessing only over the CPU cooler. Airflow direction, exhaust placement, and VRM heatsink design matter as much as — sometimes more than — the CPU cooler itself.
Closing thoughts
Dr. Vasquez’s central point is one that engineering rarely gets to make loudly in consumer marketing: coherent, well-directed airflow and correctly matched components beat brute-force cooling every time. The thermal budget of a PC is a system-level problem, not a single-component purchase decision, and the parts that fail quietly — VRMs, undersized case exhaust — are exactly the parts nobody checks.
For hands-on cooling comparisons across air towers, AIOs and custom loops, our best PC cooling guide for 2026 picks up where this interview leaves off with real benchmark data.